Extract data from any document with SmartDocumentor Cloud

Joel Monteiro
April 20, 2024Efficiently extracting data can be a formidable challenge for many businesses, especially from documents with unique layouts. From ID cards or passports to medical records, these documents often adhere to specific formats not universally standardized across industries, forcing companies to resort to very expensive solutions, be they technological tools or human workers that manually extract data. SmartDocumentor Cloud offers a powerful solution for training custom templates and automating the extraction of data from them, saving time, and reducing human error. In this step-by-step guide, we’ll walk you through the process of using SmartDocumentor Cloud to extract data from any document layout.
But before we get started, if you haven’t tried SmartDocumentor Cloud yet, click here to register for free and start your trial. You’ll receive 30 credits which you can use to train and extract data from custom template pages.
Step 1: Creating a Template
Each type of Template requires a new entry in SmartDocumentor Cloud, much like Workspaces work for invoices processing, data anonymization and transcription.
1. From the side menu, click Labeling, under Templates.
2. Next, open the Sandwich menu on the opposite side and click Create.
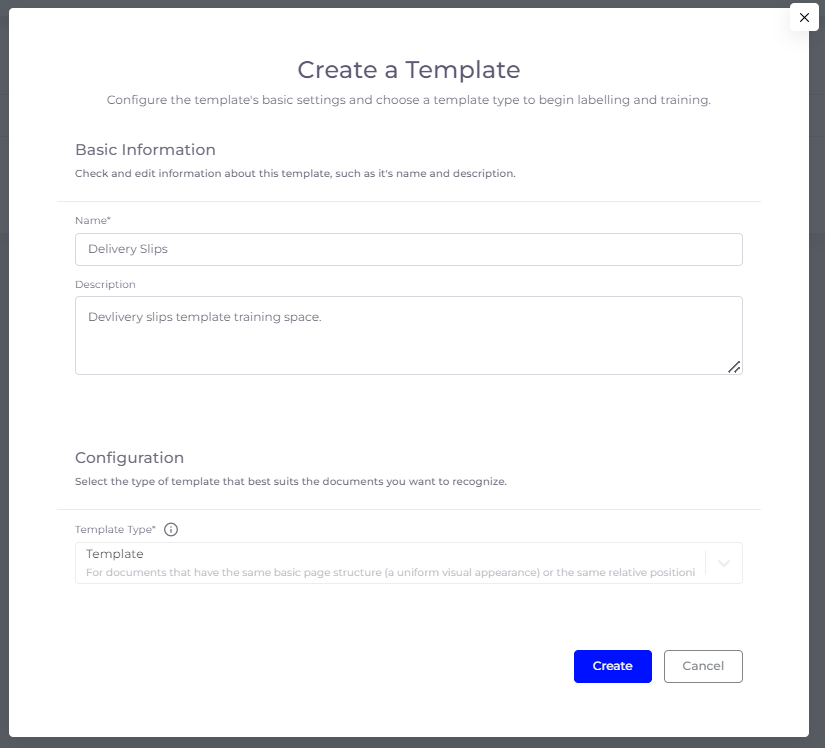
3. A modal will open asking you to name this template, write a description (optional), and pick a type of configuration:
-
- Template – if the documents you want to extract data from have the same layout.
- Neural – if the documents you want to extract data from have the same information, but the layout varies.
3. After clicking Create, it’s time to import our documents for training. SmartDocumentor Cloud supports .PDF, .PNG, .JPG and .JPEG files with a maximum of 20MB. You must upload and label at least 5 files with the template of your choice.
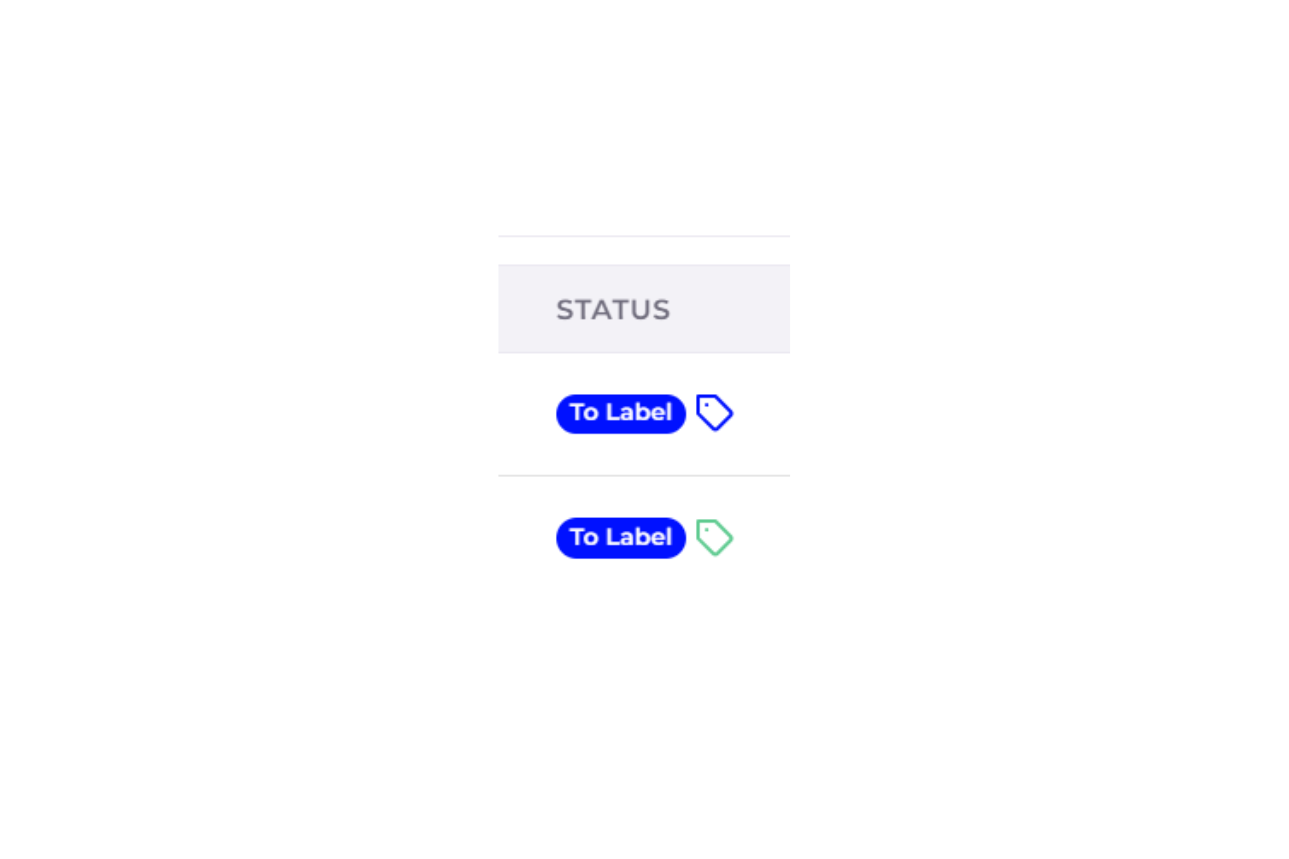
4. After importing a file, we have to label them, i.e., label the fields we want SmartDocumentor Cloud to automatically detect and extract data from in the future. Uploaded, unlabelled documents will have a “To label” status with a blue label in them. Click one to open the labelling module.

Step 2: Labelling documents and training a model
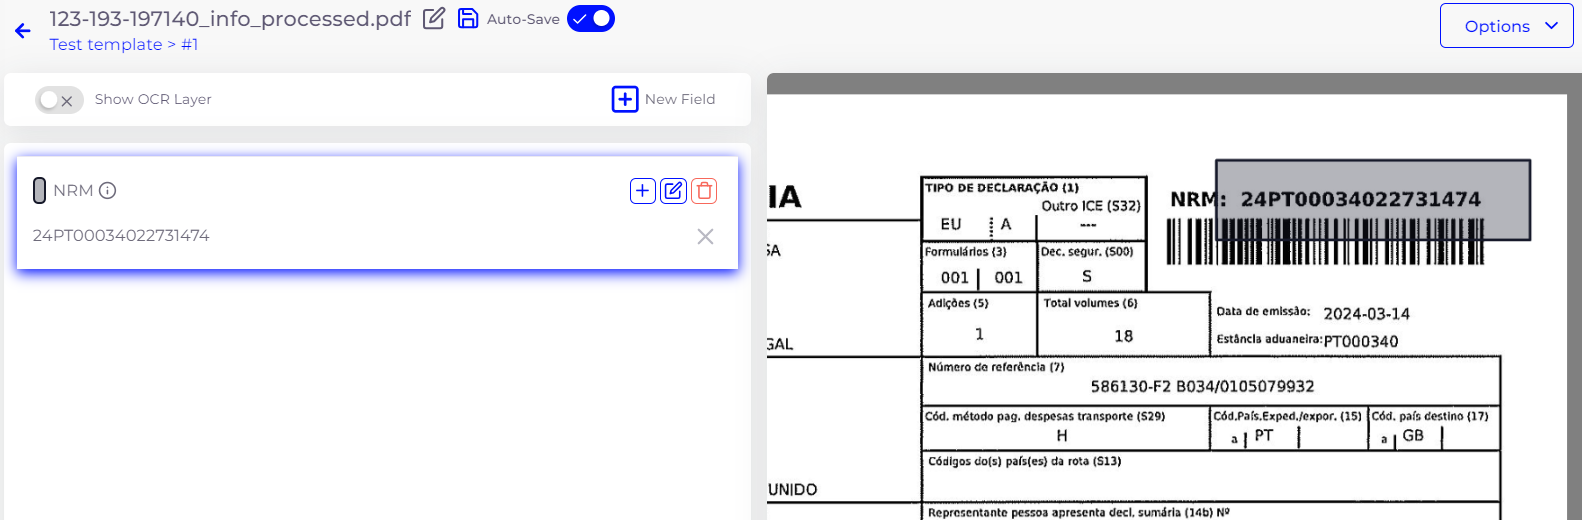
The labelling module is composed of two halves: the fields and the original document. You can toggle “Show OCR layer” to display all the fields SmartDocumentor Cloud detected, without any labelling (in most cases, it will likely detect all characters in the document).
1. Click “New Field” to add a new field.
2. A modal will pop up asking you to set a category key, a display name and identify this field’s type. There are also Advanced Options which lets you pick a color for this field and make it mandatory.
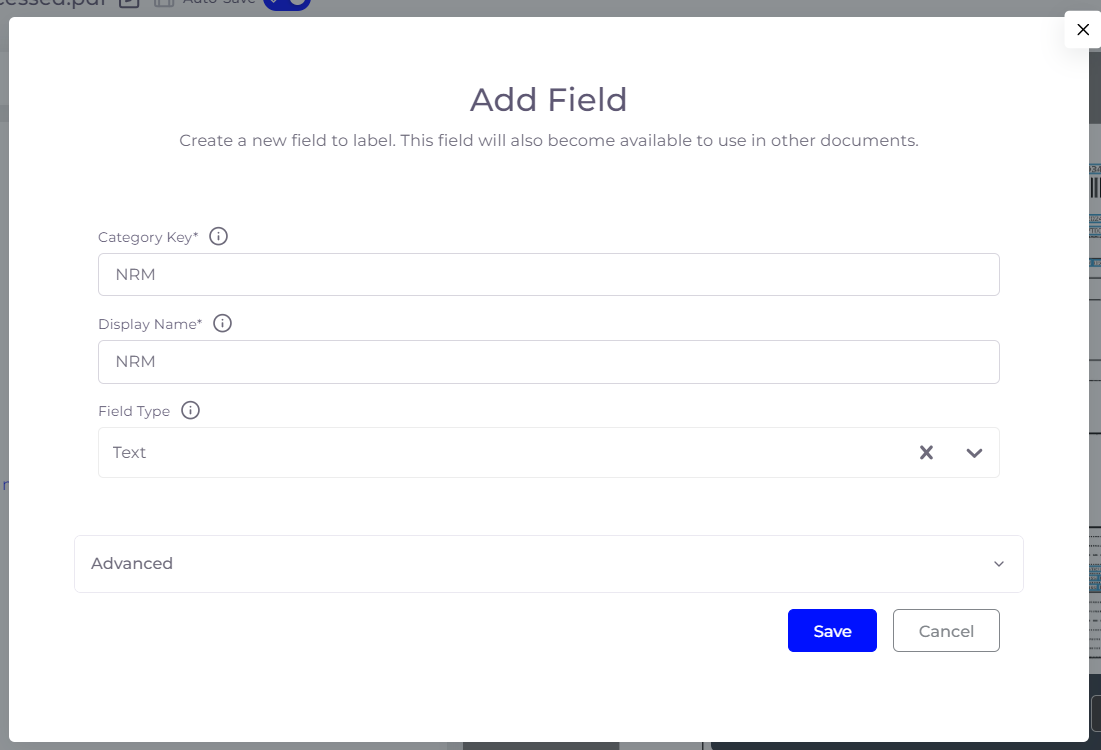
3. Picking the correct field type is extremely important and SmartDocumentor Cloud lets users choose from a vast list:
-
- Text – detect a single text line.
- Text Area – detects multiple text lines.
- HTML Text – detects HTML elements and lets you edit styling and formatting.
- HTML Text (multiple detections) – same as the previous one, but supports multiple detections on the same page or across multiple pages.
- Date – detects a date format.
- Decimal – detects numbers with decimal places (for integers, you can either pick Decimal or Text)
- Currency – detects a numeric value, even with decimal places, optimized for currencies.
- Table – detects tables, allowing you to edit rows and columns.
4. After setting up your new field, click Save.
4. Fill in your colleague’s name and email address.
5. Next, click the + button next to the field’s name. A selection tool will show up over your original document. Use this tool to select the field in the document corresponding to the one you created.
6. You must go over this process for every field you create. Once you’re done, click Next Document at the top right of the screen.
7. You will return to the Labelling page. Labelled documents will have its label color changed to green, in contrast to unlabelled ones, which are in blue.
8. Remember that SmartDocumentor Cloud requires at least 5 labelled documents with the layout you want to train a model, but the more you have, the better the results will be. Once you have those 5 documents properly labelled, click the “Train Model” button at the top right of your screen.
Step 3: Creating a workspace for a custom template
All data processing inside SmartDocumentor Cloud happens inside a workspace and each data type requires its own workspace. To learn more about workspaces, read through SmartDocumentor Cloud 101.
1. Go to Documents, All. Click the Workspaces sandwich menu at the top right corner of the screen.
2. Click “Create”.
3. A modal will pop up, prompting you to name your workspace (mandatory) and write a description. The first workspace you create in SmartDocumentor Cloud will be automatically set as your default workspace. When you create a new one, you can set it as your default workspace by toggling that option .
4. Next, you must select a template for your workspace. Click Configuration to open the dropdown menu and select a template that corresponds to the one you just trained (by default, it will be the last on the list).
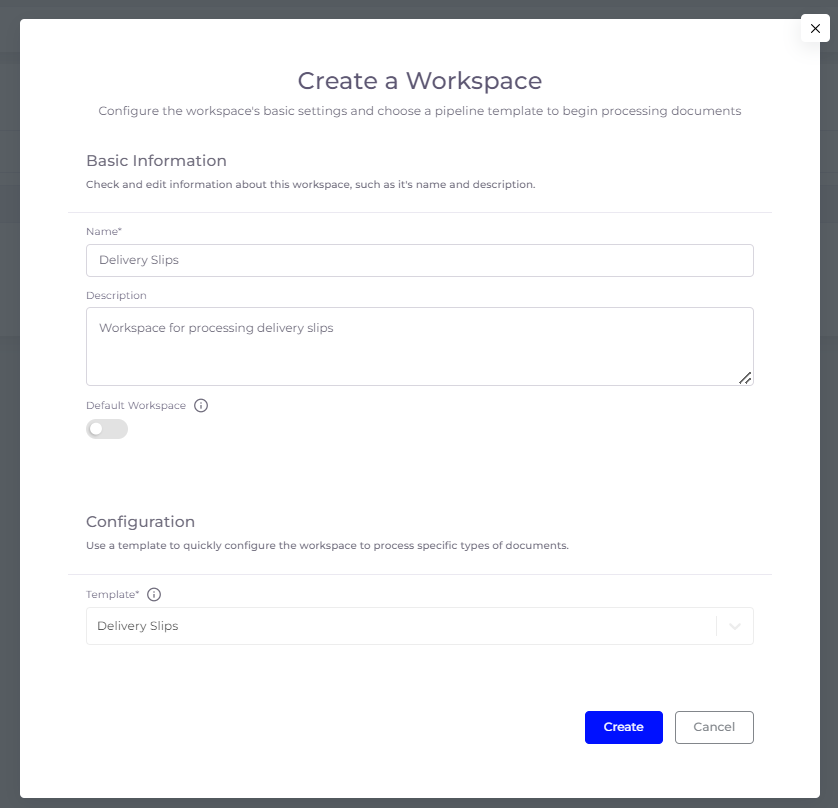
5. Finish by clicking “Create”.
Step 4: Adding users to a workspace
SmartDocumentor Cloud is a collaborative platform and if you plan to have multiple colleagues revising your company’s documents, you should add them.
1. Click Workspaces from the menu on the left.
2. Navigate to the “Users” tab.
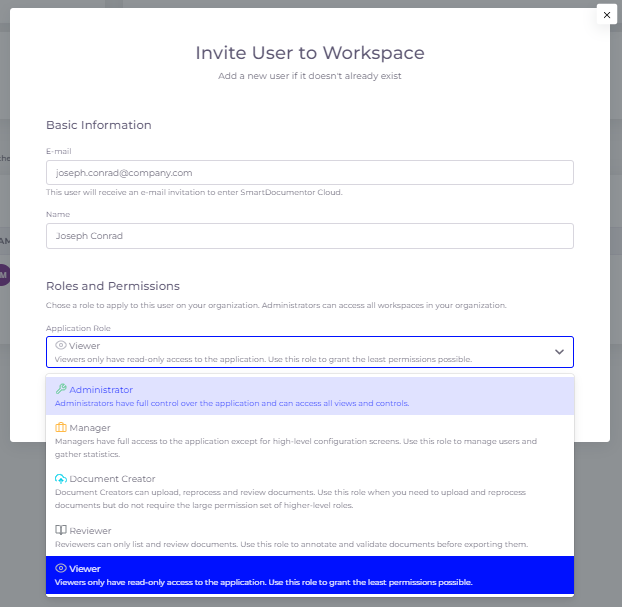
3. Click “Invite user to workspace”.
4. Fill in your colleague’s name and email address.
5. Pick a role from the dropdown menu. Each role’s description is right next to it.
6. Finish by clicking “Invite”.
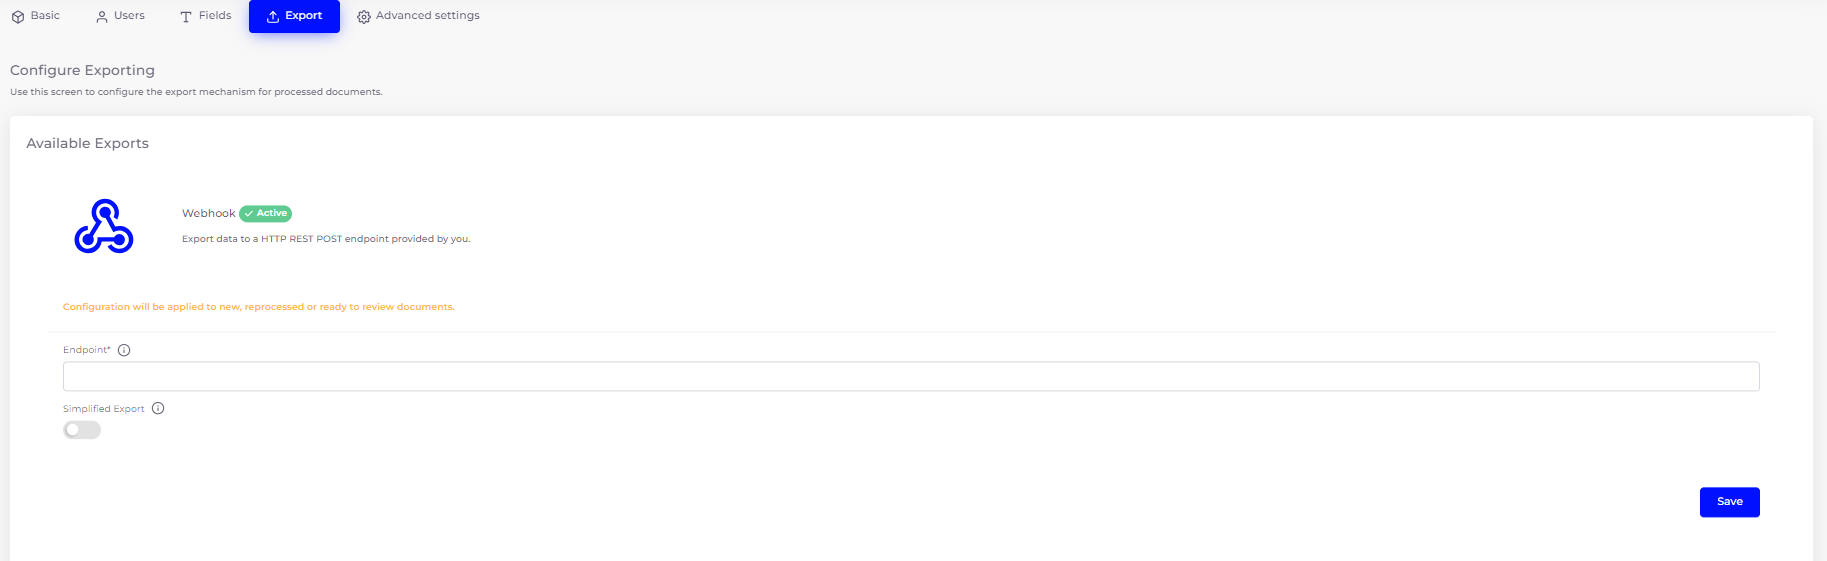
Step 5: Configuring an export mechanism
SmartDocumentor Cloud can operate as an end-to-end solution if you configure its import and export endpoints. To do the latter, all you must do is go to the Export tab in your workspace settings and, under Webhook, paste an endpoint that accepts a HTTP POST request with a JSON payload, and allows anonymous access. Click save to finish.
Step 6: Uploading Documents
After adding your colleagues to the platform, click Documents once more and select either All (if you wish to add individual documents) or Batches (if you wish to add a group of documents that will be grouped as a batch).
1. Once you’re inside All (documents), click the Import button. A modal will pop up with 4 import options:
-
- Web – upload files to the web by dragging and dropping them here or browsing your computer.
- URL – if your file is hosted on a public URL or a URL with a generated access token in it, you can paste it here and SmartDocumentor Cloud will retrieve the file.
- Email – send your file as an attachment to the unique email address SmartDocumentor Cloud generated for your company.
- API – connect to SmartDocumentor Cloud via API and have your files automatically uploaded to the platform.
2. If you choose either Web or URL, click Import to upload your file to SmartDocumentor Cloud.
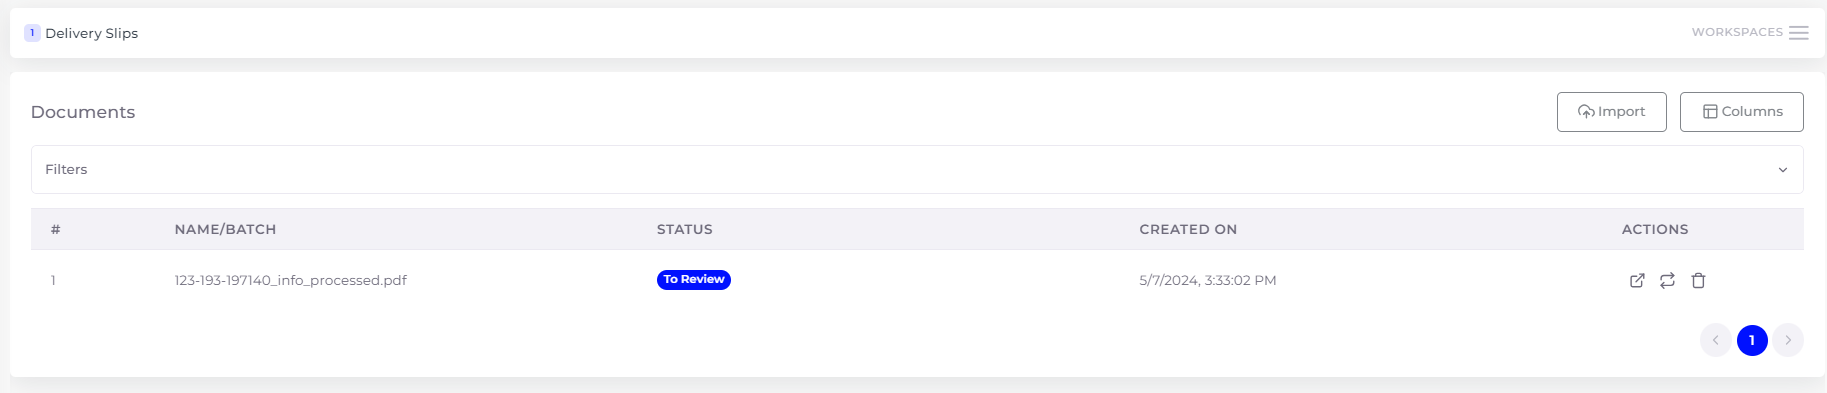
3. SmartDocumentor Cloud processes the file as soon as it’s uploaded. The file will be displayed on a table with one of its columns being Status. Once the Status changes to “To Review”, you can click your file’s line to start the revision process.
Step 7: Revision
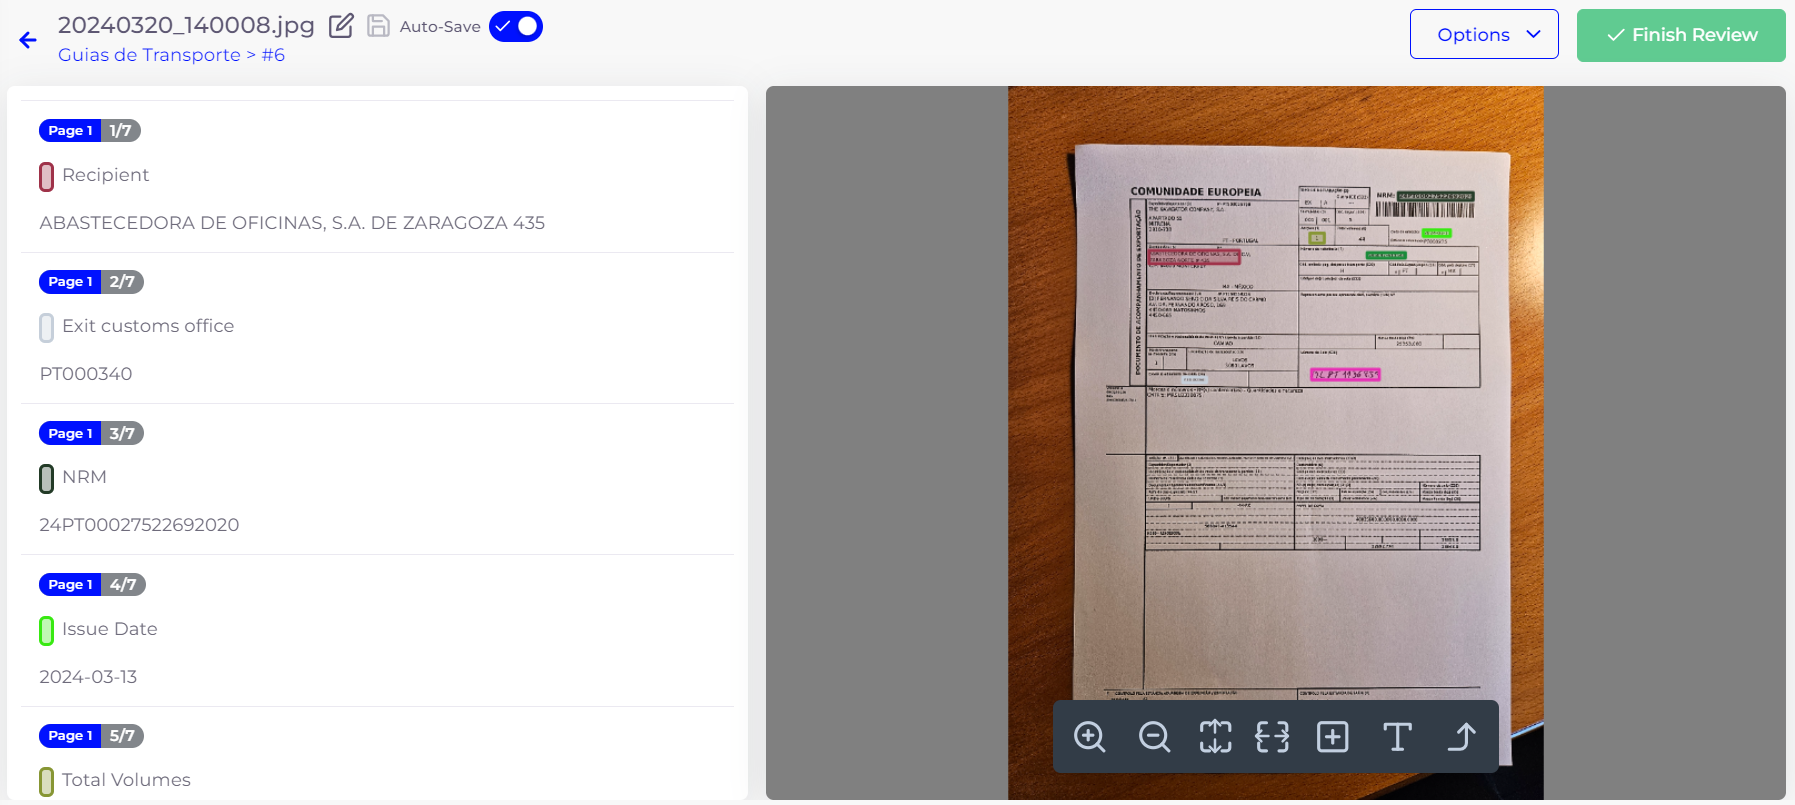
The revision module is composed of two halves: the extracted data and the original document.
1. As you enter it, you will notice that your original document will have several highlighted fields, corresponding to the fields SmartDocumentor Cloud is trained to detect.
2. You can adjust them to your liking by going to your workspace Settings and clicking the Fields tab. Important note: Changes in the Fields tab will only be applied in future documents. You must reprocess an already processed document if you want SmartDocumentor Cloud to detect new fields in it.
3. Each field in your original document half will correspond to an entry in the extracted data half. By clicking a field on either side, SmartDocumentor Cloud will match it on the other by zooming in or jumping to it.
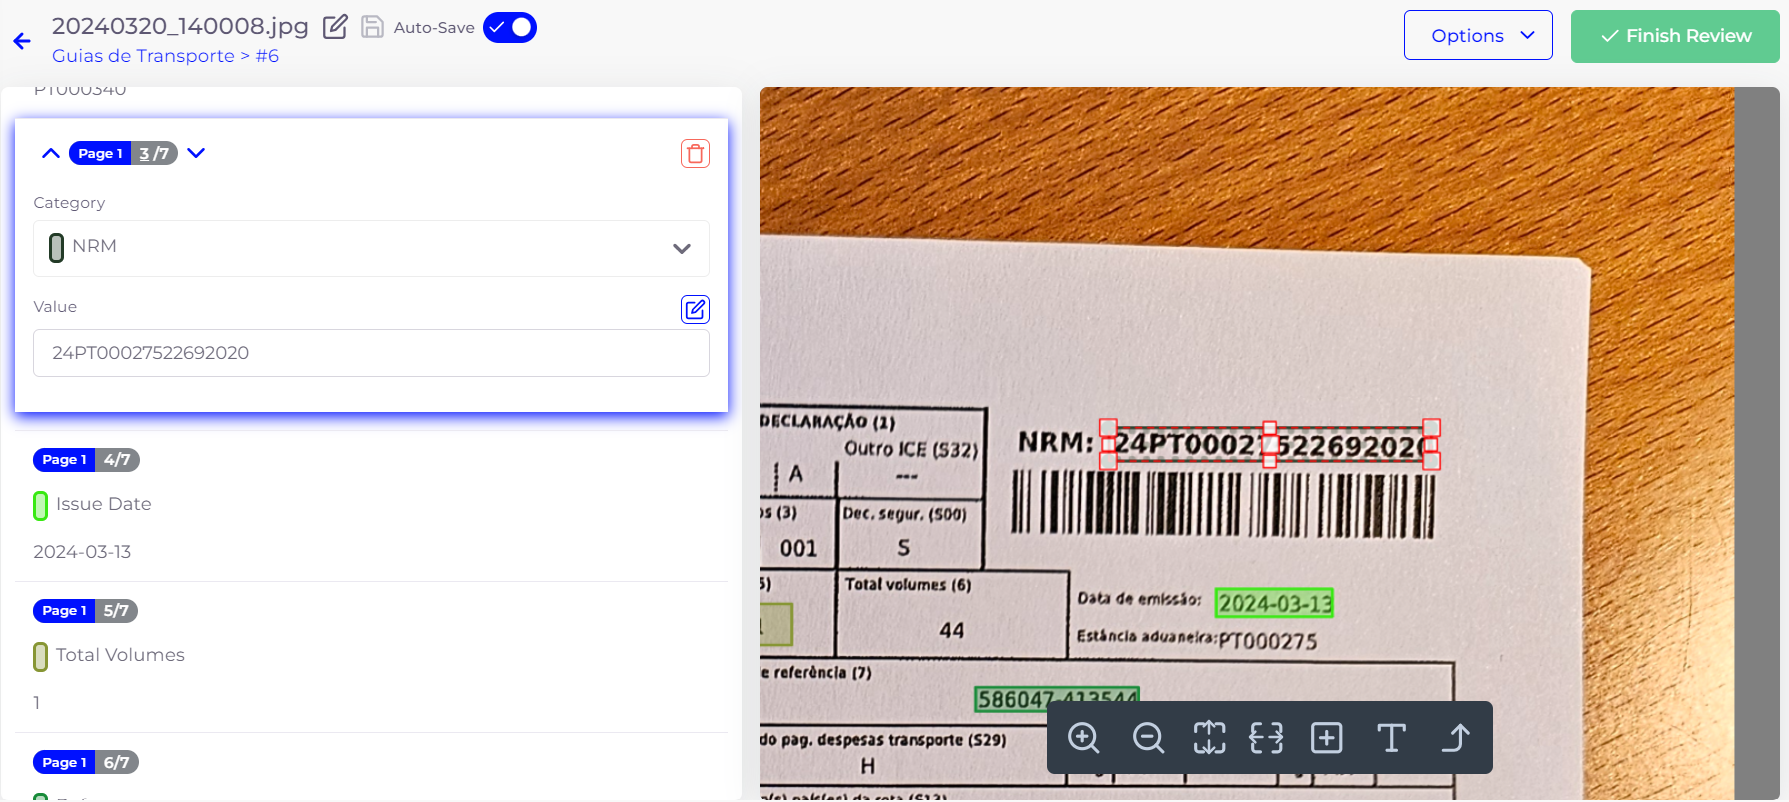
4. Despite being highly accurate, we always advise our clients to go over each value extracted by SmartDocumentor. If you find any extraction mistakes, you can simply click the field on extracted data side and change its value manually.
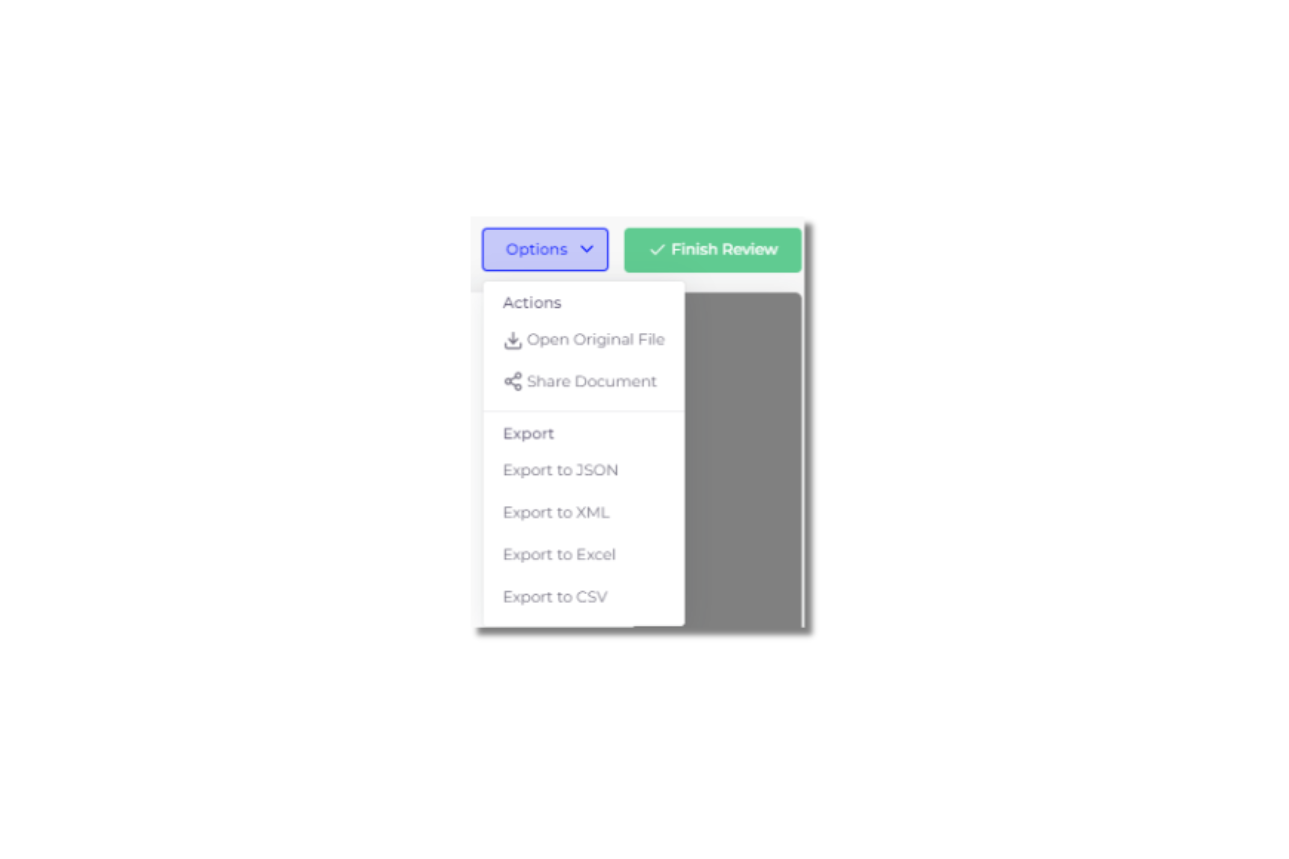
5. Once you’re done reviewing the document, you can click the Options button to export the data in one of the structured and unstructured data formats available or click Finish review to exit the module and archive your document.
Conclusion:
SmartDocumentor Cloud offers a powerful solution for automating the extraction of data from any type of document, saving time, reducing errors, and improving efficiency. We hope our solution is simple enough to use and this step-by-step guide fills in any gaps in the user experience. If you still have any questions about processing documents in SmartDocumentor Cloud or run into any errors doing it, get in touch with our team at support@devscope.net.

Anonymize documents and images with SmartDocumentor Cloud
In this guide, we'll walk you through the process of using SmartDocumentor Cloud to anonymize images and documents.