Anonymize documents and images with SmartDocumentor Cloud

Joel Monteiro
April 19, 2024Data anonymization is part of the daily activities of many organizations due to security reasons, to keep up with compliance laws and policies, or to enhance consumer trust. Keeping personal data can be a liability, so many resort to anonymization procedures, most performed manually by workers who dedicate huge amounts of their time to it. SmartDocumentor Cloud offers a powerful solution for automating the anonymization process of documents and images, saving time, and reducing human error. In this step-by-step guide, we’ll walk you through the process of using SmartDocumentor Cloud to anonymize documents and images.
But before we get started, if you haven’t tried SmartDocumentor Cloud yet, click here to register for free and start your trial. You’ll receive 30 credits which you can use to anonymize up to 30 pages and images.
Step 1: Creating an anonymization workspace
All data processing inside SmartDocumentor Cloud happens inside a workspace and each data type requires its own workspace. To learn more about workspaces, read through SmartDocumentor Cloud 101.
1. Once you log into SmartDocumentor Cloud, click the Workspaces sandwich menu at the top right corner of the screen.
2. Click “Create”.
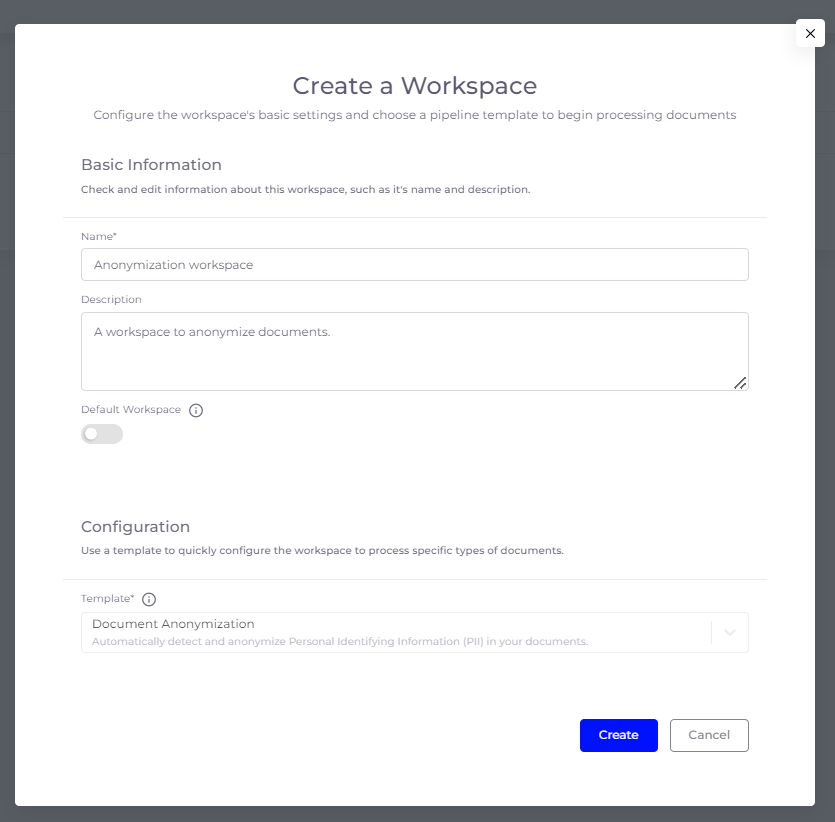
3. A modal will pop up, prompting you to name your workspace (mandatory) and write a description. The first workspace you create in SmartDocumentor Cloud will be automatically set as your default workspace. When you create a new one, you can set it as your default workspace by toggling that option .
4. Next, you must select a template for your workspace. Click Configuration to open the dropdown menu and select Document Anonymization or Image Anonymization. Important note: in this tutorial, we are going to anonymize a document but keep in mind that the workspace we’re creating won’t be able to anonymize an image; you must create a new workspace and pick Image Anonymization during the configuration to be able to anonymize images.
5. Finish by clicking “Create”.
Step 2: Adding users to your workspace
SmartDocumentor Cloud is a collaborative platform and if you plan to have multiple colleagues revising your company’s documents, you should add them.
1. Click Workspaces from the menu on the left.
2. Navigate to the “Users” tab.
3. Click “Invite user to workspace”.
4. Fill in your colleague’s name and email address.
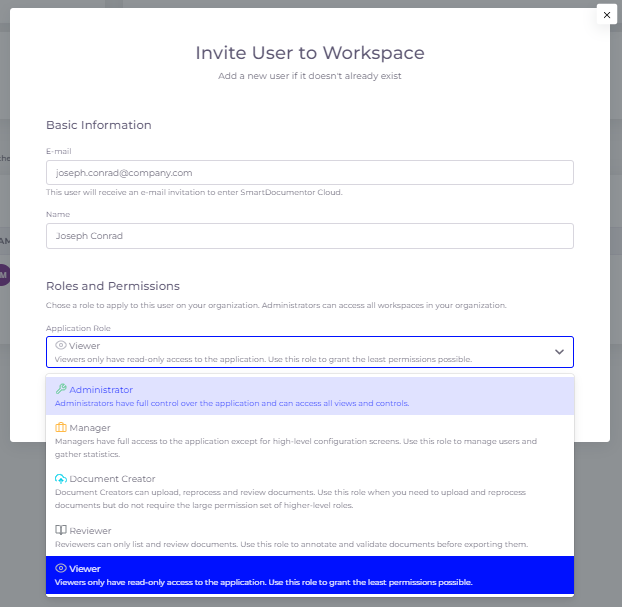
5. Pick a role from the dropdown menu. Each role’s description is right next to it.
6. Finish by clicking “Invite”.
Step 3: Configuring an export mechanism
SmartDocumentor Cloud can operate as an end-to-end solution if you configure its import and export endpoints. To do the latter, all you have to do is go to the Export tab in your workspace settings and, under Webhook, paste an endpoint that accepts a HTTP POST request with a JSON payload, and allows anonymous access. Click save to finish.

Step 4: Uploading Documents
After adding your colleagues to the platform, click Documents once more and select either All (if you wish to add individual documents) or Batches (if you wish to add a group of documents that will be grouped as a batch). For this tutorial, we want to anonymize a document, so we will click All.
1. Once you’re inside All (documents), click the Import button. A modal will pop up with 4 import options:
-
- Web – upload files to the web by dragging and dropping them here or browsing your computer.
- URL – if your file is hosted on a public URL or a URL with a generated access token in it, you can paste it here and SmartDocumentor Cloud will retrieve the file.
- Email – send your file as an attachment to the unique email address SmartDocumentor Cloud generated for your company.
- API – connect to SmartDocumentor Cloud via API and have your files automatically uploaded to the platform.
2. If you choose either Web or URL, click Import to upload your file to SmartDocumentor Cloud.
SmartDocumentor Cloud processes the file as soon as it’s uploaded. The file will be displayed on a table with one of its columns being Status. Once the Status changes to “To Review”, you can click your file’s line to start the revision process.

Step 5: Revision
The revision module is composed of two halves: the detected fields for anonymizations and the original document.
1. As you enter it, you will notice that your original document will have several highlighted fields, corresponding to the fields SmartDocumentor Cloud is trained to detect and anonymize.
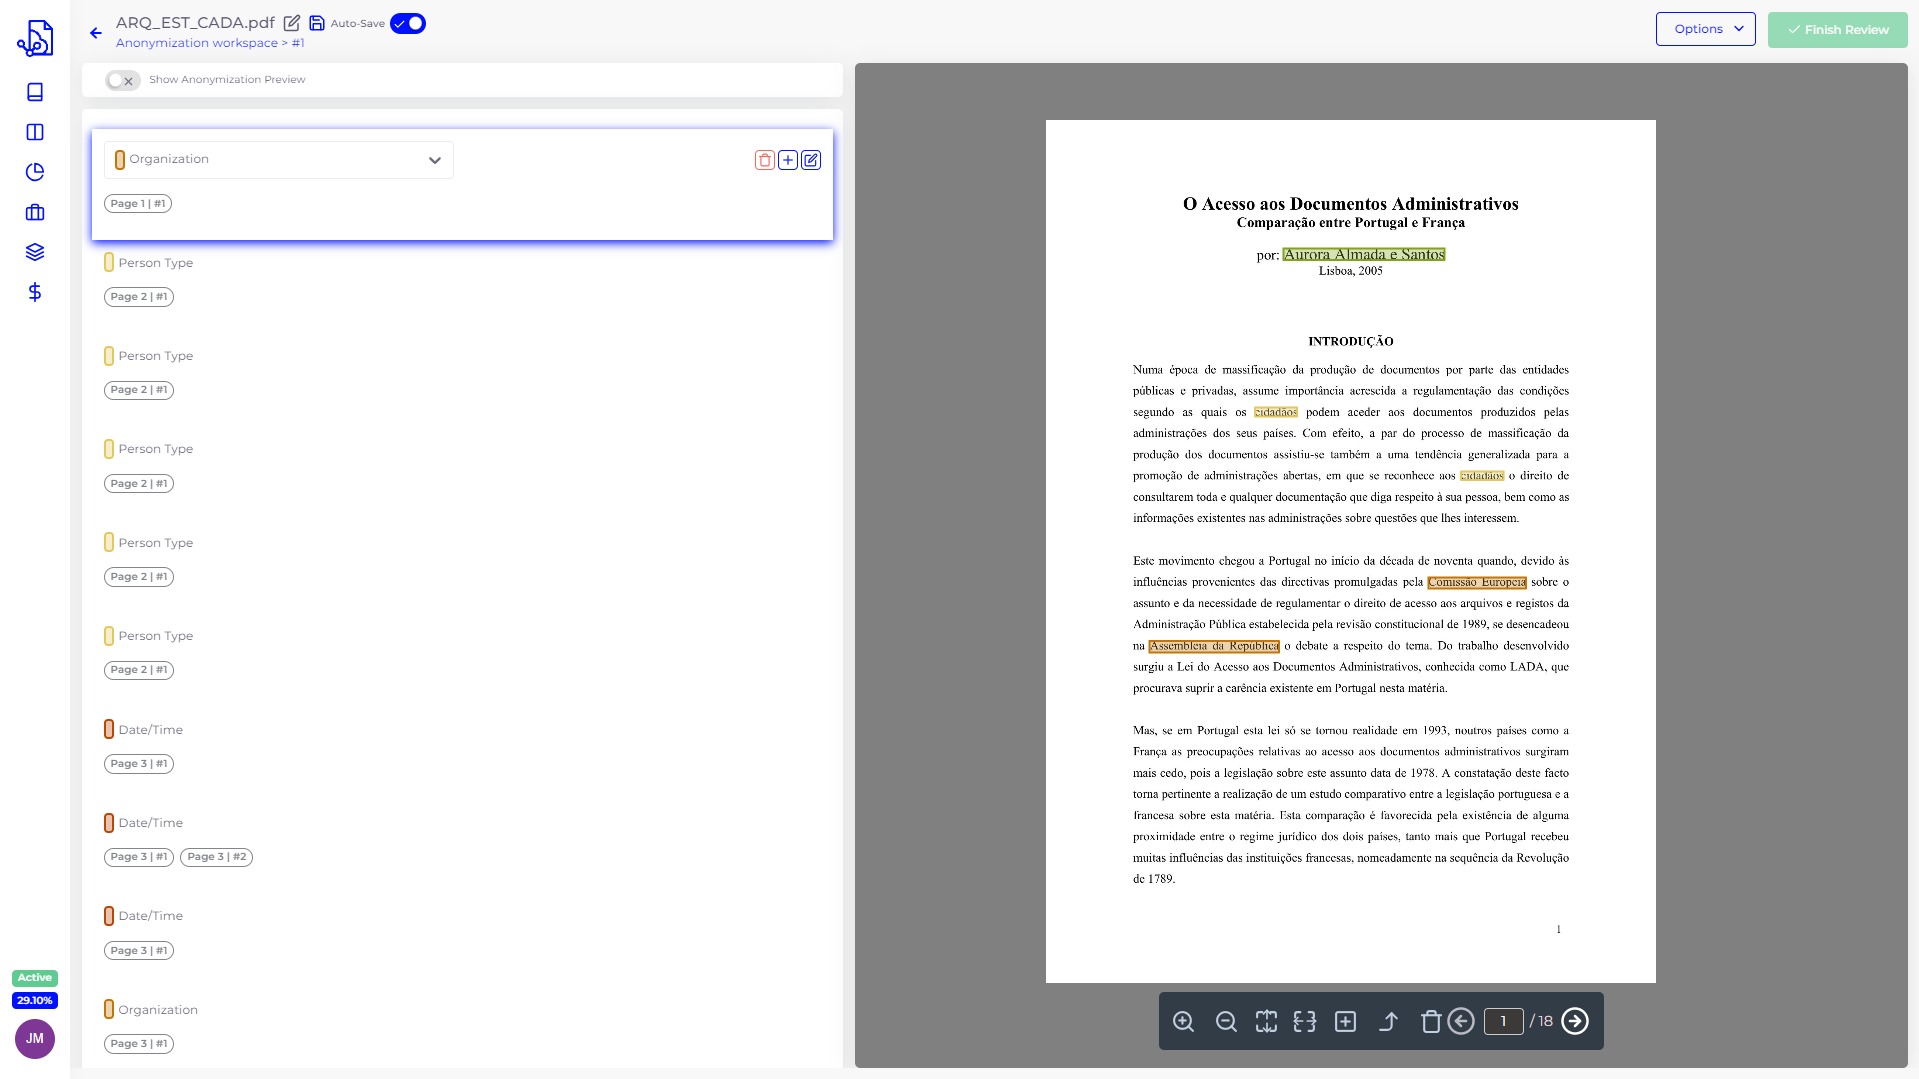
2. You can adjust them to your liking by going to your workspace Settings and clicking the Fields tab. Important note: Changes in the Fields tab will only be automatically applied in future documents. You must reprocess an already processed document if you want SmartDocumentor Cloud to detect new fields in it.
3. If during the revision process you detect some words that shouldn’t have been redacted but were automatically or that you would like to redact, but SmartDocumentor Cloud didn’t detect, just click that field to open the options.

4. The delete button will delete all instances of the field throughout the document. Warning: this action is not reversible.
5. The Plus button will create a new detection and add it to the current group.
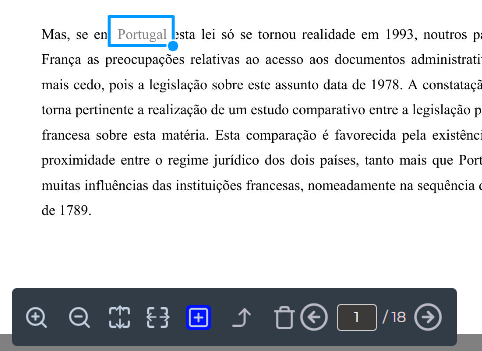
6. The last button will create a new detection and replace the current group. In the example below, we are using the Organization group to detect Portugal instead of Comissão Europeia:

7. Finally, you can use the Plus button on the document half of the screen to manually add a new section to anonymize.
8. When you finish reviewing the document, all the highlighted fields will be redacted with black bars. You can toggle the Anonymization Preview at the top left corner of the screen to see the final result.
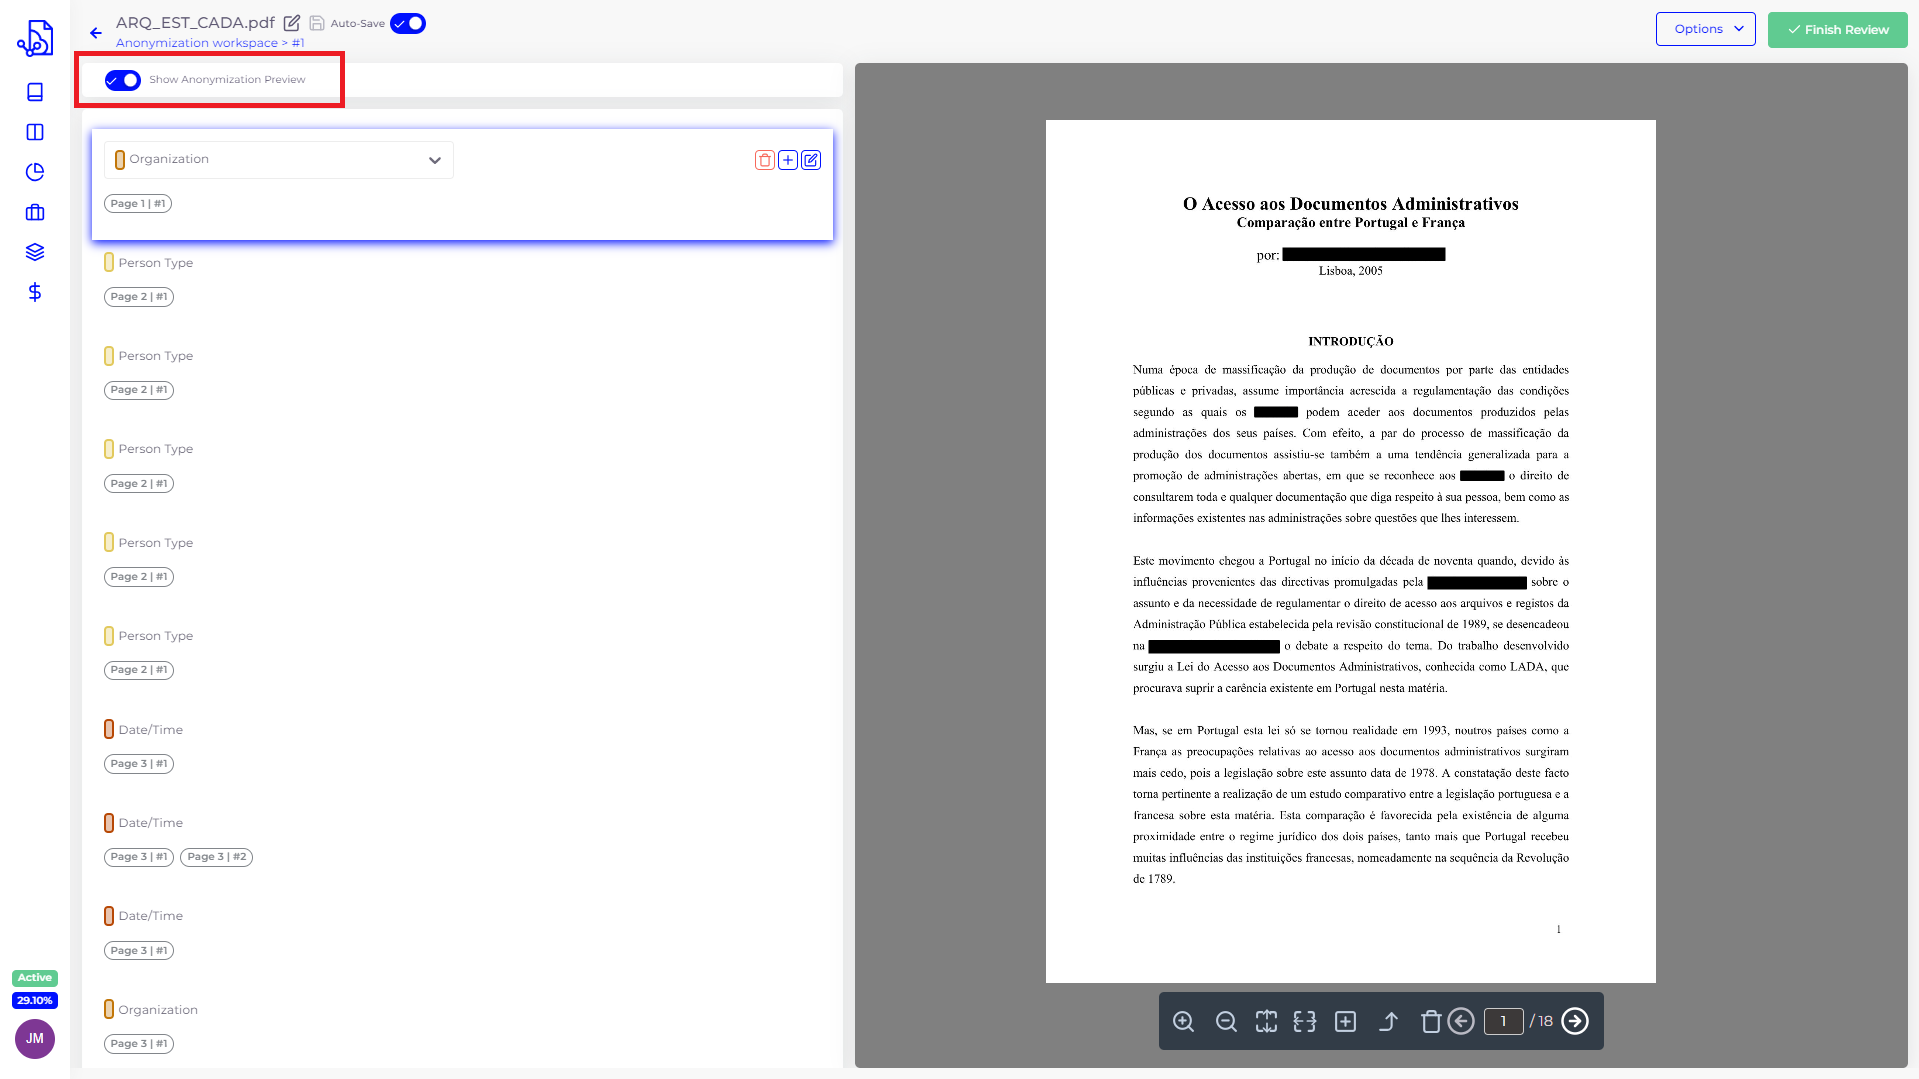
9. Despite being highly accurate, we always advise our clients to go over each value detected by SmartDocumentor. If you find any mistakes, you can simply click the field and delete it or manually add another section that needs to be redacted.
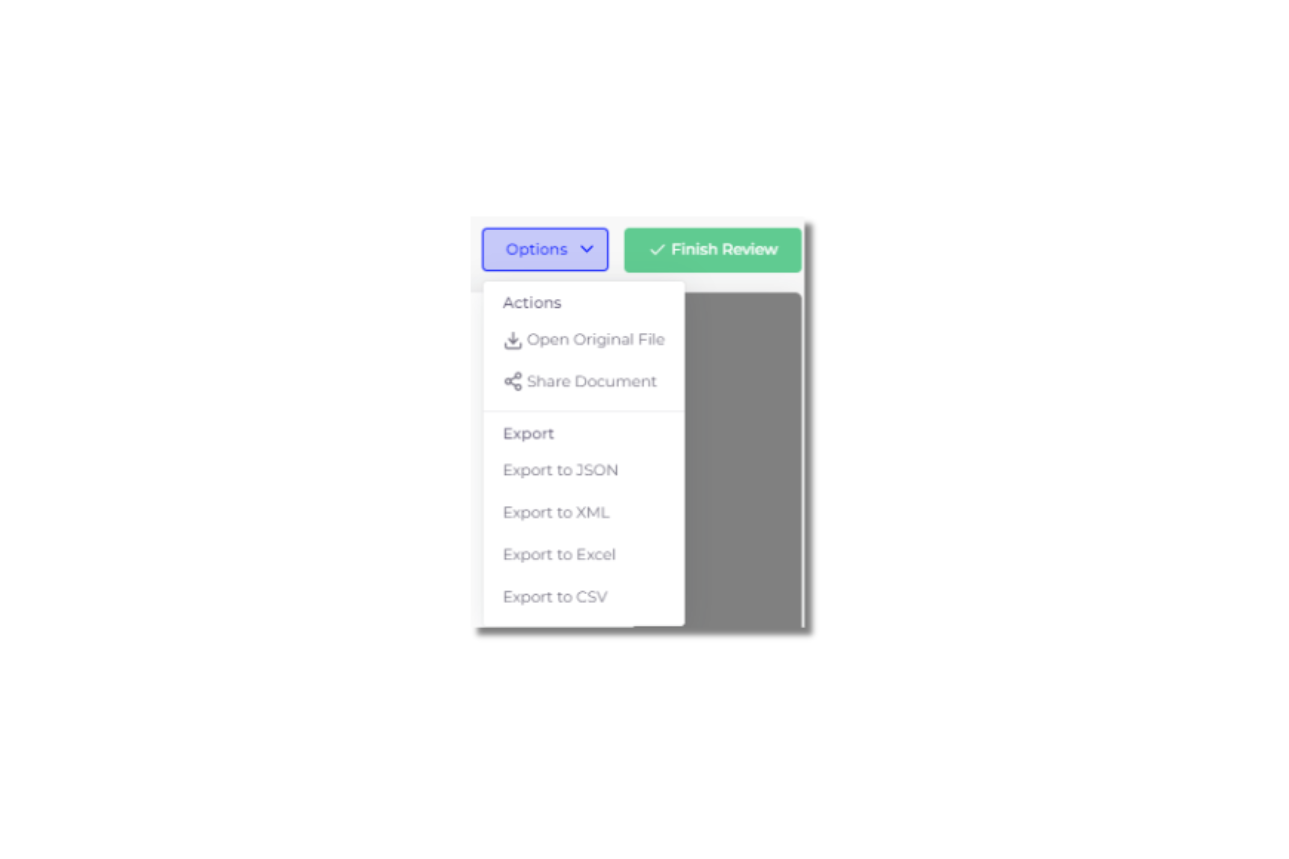
10. Once you’re done reviewing the document, you can click the Options button to export the anonymized document as a PDF, PNG or JPEG or click Finish review to exit the module and archive your document.
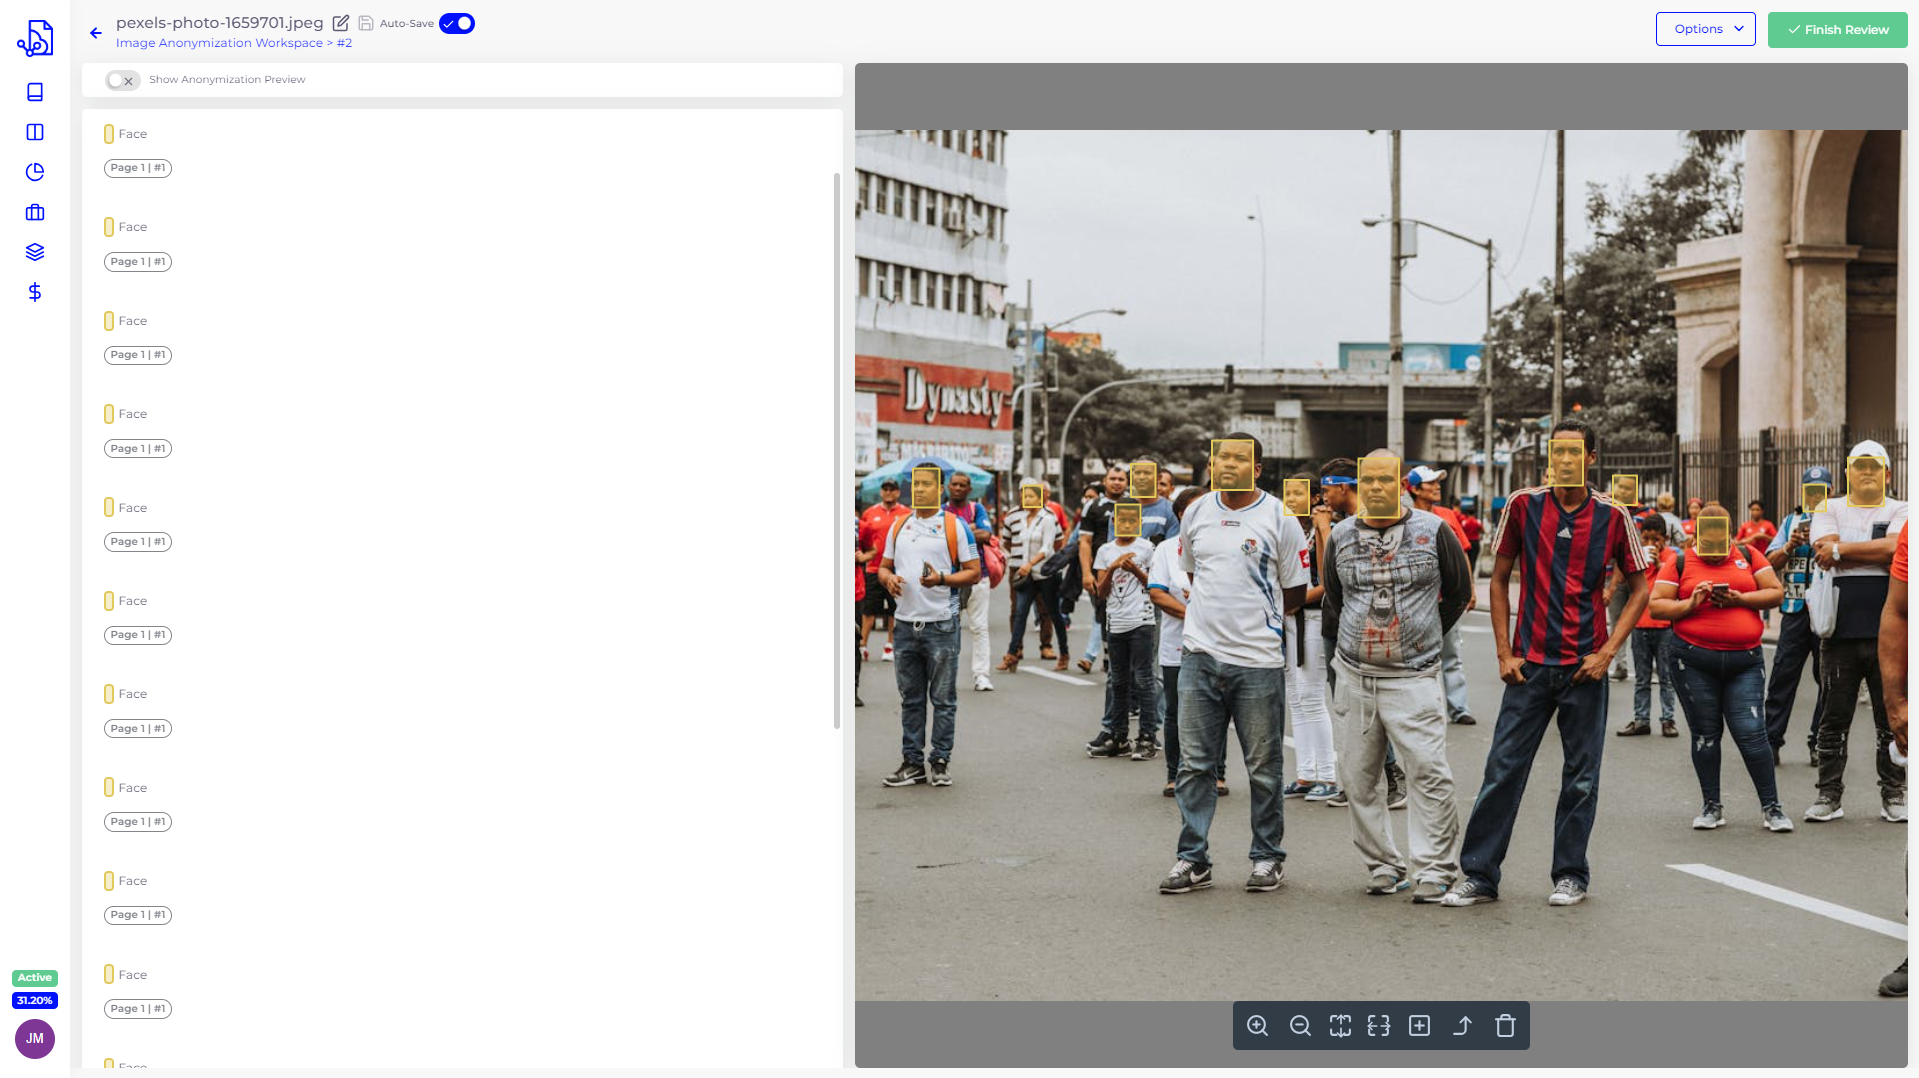
11. Image anonymization works just the same way. Just remember that you must create a workspace dedicated to it and select that option from the menu.
Conclusion:
SmartDocumentor Cloud offers a powerful solution for automating the anonymization of documents and images, saving time, reducing errors, and improving efficiency. We hope our solution is simple enough to use and this step-by-step guide fills in any gaps in the user experience. If you still have any questions about processing invoices and receipts in SmartDocumentor Cloud or run into any errors doing it, get in touch with our team at support@devscope.net.

How to process invoices and receipts with SmartDocumentor Cloud
In this guide, we'll walk you through the process of using the invoices and receipts processing module of SmartDocumentor Cloud.
